
|
 The functionality described in this
topic is only available when you mark Show
Advanced Options.
The functionality described in this
topic is only available when you mark Show
Advanced Options.
Add/Review Content
Select Existing Probes
Select Probe Source
Select probes by Probe ID
This screen of the advanced ChIP wizard is for selecting specific probes from an existing design or probegroup by entering the Probe IDs of the desired probes. SureDesign will then search the probes in the existing design/probegroup to locate the ones that match the specified Probe IDs, and add those probes to the new design.
In the Probe IDs text area, enter the Probe IDs of the probes that you want to add to your design using either of the following approaches:
· Type or paste the Probe IDs directly into the text area. List one Probe ID per line.
· Click Upload to browse to a text file (*.txt) that lists the Probe IDs (one Probe ID per line).
The Probe IDs for an existing design are listed in the design's probes.txt file. See Download design files for information on how to download this file for a particular design.
Click Next to continue to Screen 2.
This screen provides a summary that indicates the number of Probe IDs that you entered on the previous screen. Review the summary before proceeding. When you are finished, click Pick Probes. The program will search the selected probe source for probes with the Probe IDs that you entered.
Probegroup Name
SureDesign automatically populates the Probegroup Name field with a default name. To change the name, type a new name into the field.
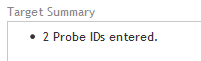
Target Summary
The Target Summary area displays the total number of probe IDs that you entered on the previous screen.
To submit the design for probe picking:
Click Pick
Probes.
A message box opens indicating the e-mail address where Agilent will
contact you when the probe selection job is complete. If desired,
you can enter additional e-mail addresses into the provided field.
Click OK
in the notification message to submit the design to SureDesign.
Your submission is placed in the SureDesign job queue to await probe
selection.
The wizard takes you to the Add/Review
Content screen. The new probegroup appears in the Probegroup Summary
table. The # Targets column of the table lists Processing
until the probe selection job is complete. Click the refresh icon
![]() to see updates to this column.
to see updates to this column.
You receive an e-mail from Agilent SureDesign notifying you when your
job is complete. In order to finalize the design, you must wait until
your probe selection job is complete.