
|
The instructions provided in this help topic explain how to:
Advanced custom designs (designs created with a SureDesign advanced wizard and designs originally created in Agilent eArray) can be assigned a description and keywords. For advanced designs that you created, you can edit the description and keywords from the Edit Design dialog box.
To open the Edit Design dialog box: Locate the design of interest on the Find Designs screen (see View and search for designs for instructions) or in the Designs: Recent and Favorites dashboard on the Home screen. Click directly on the design name to open the details window for that design. Near the top right corner of the details window, click Edit.
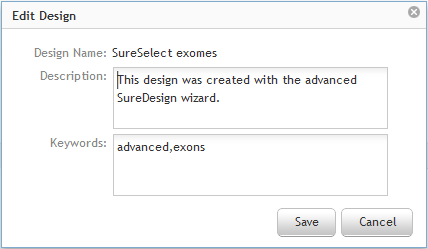
Make the desired edits to the Description and Keywords fields, following the guidelines below:
· Limit each field to 2000 characters.
· In the Description field, use only alphanumeric characters (a-z, A-Z, and 0-9) and the following special characters: _, -, $, #, @.
· In the Keywords field, use only alphanumeric characters (a-z, A-Z, and 0-9), commas, dashes, and underscores. Separate multiple keywords with a space or a comma.
Click Save to save your changes.
For custom designs that you created, the Select Destination Folder dialog box allows you to move a design from its current folder to the folder that you select in the dialog box. The destination folder can be within your workgroup or within a collaboration, and it can be an existing folder a new folder. Note that you can use this same process to move a custom probegroup to a different folder.
NOTE You cannot move a OneSeq design if the spike-in design is used in other OneSeq designs or SureSelect Combined designs or if you are not the owner of the spike-in design.
To open the Select Destination Folder dialog box: Locate the design of interest in the table on the Find Designs screen (see View and search for designs for instructions) or in the Designs: Recent and Favorites dashboard on the Home screen. Click directly on the design name to open the details window for that design. Near the top right corner of the details window, click Move.
From the Select Destination Folder dialog box, select the folder for the design or create a new folder and select it. Workgroup folders are listed on the My Designs tab. Collaboration folders (if available) are listed on the Collaborations tab.
To select an existing folder for the design:
Select the desired tab (My Designs or Collaborations) in the Select Destination Folder dialog box.
Mark the check box next to the folder you
want to select. You may have to expand a folder in order to see all
folders.
The bottom of the dialog box displays the path of the currently selected
folder.
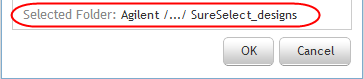
Click OK.
The dialog box closes and a message box opens notifying you that SureDesign
has started the process of moving the design to the selected folder.
To perform the move, SureDesign puts your move request into its jobs
queue. SureDesign can typically complete a job for a move request
quickly, but requests for a complex move (e.g. moving a design from
a workgroup folder to a collaboration folder) may take longer.
You receive an e-mail from Agilent SureDesign when the move is complete.
To create and select a new folder for the design:
Select the desired tab (My Designs or Collaborations) in the Select Destination Folder dialog box.
Mark the check box next to the existing folder in which you want to create a new folder. You may have to expand an existing folder in order to see all folders.
Click New.
In the text box that opens, type a name for
the new folder and click Add.
Use only alphanumeric characters (A-Z, a-z, and 0-9) and underscores
in the folder name.
The new folder is created and selected.
Click OK.
The dialog box closes and the design is moved to the selected folder.
You can delete a custom design from the Find Designs screen. Note that you can only delete designs that you created.
To delete a design:
Navigate to the Find Designs screen and locate the design that you want to delete. See View and search for designs for tips on finding a specific design.
In the Actions column for that design, click Delete.
In the Delete Design confirmation dialog box
that opens, click Yes to confirm
that you want to delete the selected design.
For custom designs created with an advanced SureDesign wizard, the
dialog box asks if you also want to delete the probegroups that within
the design or delete the design.
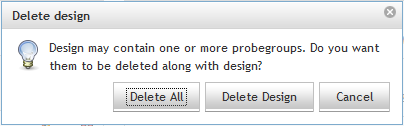
· Click Delete All to delete the design and the probegroups.
· Click Delete Design to delete only the design and keep the probegroups.
Designs in Draft status
can also be deleted from the Designs:
In Progress dashboard on the Home screen. Click the Cancel icon ![]() next to the design that you want to delete.
next to the design that you want to delete.
See Also