
|
The functionality described in this topic is only available to workgroup administrators.
The table in the Settings > Manage Workgroup dialog box lists all user accounts in the workgroup, including new accounts that are awaiting administrator approval. The form in the Settings > Create User dialog box allows workgroup administrators to set up new SureDesign accounts for new users within the workgroup.
To open the Settings > Manage Workgroup dialog box: From any program screen, click Settings (near the top right corner of the screen), then click Manage Workgroup.
To open the Settings > Create User dialog box: From any program screen, click Settings (near the top right corner of the screen), then click Create User.
You can create user accounts for new SureDesign users in your workgroup from the Settings > Create User dialog box.
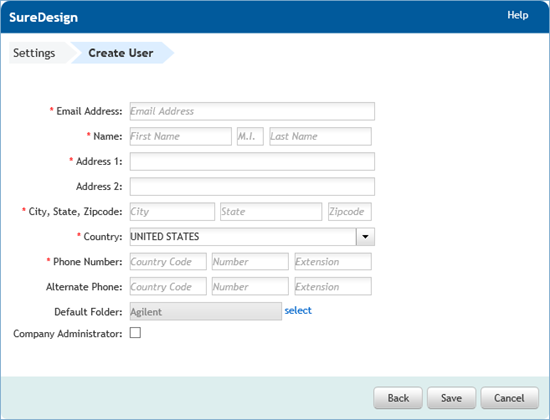
To create a user account:
Open the Settings > Create User dialog box.
Type an e-mail address for the new user in
the Email Address field.
The e-mail address serves as the user ID for logging in to SureDesign.
Type the user's first name, middle initial
(M.I.), and last name into the three Name
fields.
The M.I. field is optional.
In the fields provided for address (Address 1,
Address 2,
Country,
and City, State, Zipcode), type
the address of the user's organization, company, or institution.
The Address 2 field is optional.
In the Phone Number fields, type the primary
telephone number for the user. If desired, type a secondary telephone
number in the Alternate Phone Number fields.
The first field is for your country code and the second field is for
your telephone number. The third field is optional and provides a
space for an extension number.
In the Default Folder field, select a workgroup folder that will be the default location for content created by the new user.
If the user needs to be a workgroup administrator, mark Company Administrator. Otherwise, leave that check box clear.
Click Save.
A message box opens confirming that the user account is created. The
user will receive an e-mail from the Agilent SureDesign team with
instructions on completing the setup of their new account.
When new users register for a SureDesign account and request to join your workgroup, you receive an e-mail from Agilent SureDesign with the users' information. In order to allow a new user into your workgroup, you need to accept the request.
NOTE By accepting a request, you are enabling that user's SureDesign account, which permits the user to log in to SureDesign as a member of your workgroup and access all designs in the workgroup.
To enable a new user account from the Home screen:
In the Messages dashboard, locate Request to Join Workgroup message.
Below this message, click Accept.
A confirmation message opens confirming that the user is now an active
member of the workgroup and can log in to SureDesign.
The new user will receive an e-mail from Agilent SureDesign confirming
that the new account is now active.
If you wish to deny the user's request for a SureDesign account in
your workgroup, click Reject
instead of Accept.
To enable a new user account from the Settings > Manage Workgroup dialog box:
Open the Settings > Manage Workgroup dialog box.
In the table, locate the user ID for the account
that you want to enable.
Accounts that are awaiting your approval have a status of NEW.
In the Actions column, click Accept.
The account status updates to Enabled.
The new user will receive an e-mail from Agilent SureDesign confirming
that the new account is now active.
If you wish to deny the user's request for a SureDesign account in
your workgroup, click Reject
instead of Accept.
When a SureDesign user in your workgroup leaves the organization or no longer requires a SureDesign account, you can disable the account from the Settings > Manage Workgroup dialog box.
To disable a user account:
Open the Settings > Manage Workgroup dialog box.
In the table, locate the user ID for the account that you want to disable.
In the Actions column, click Disable.
The account status updates to Disabled.
To re-enable a disabled account, open the Settings > Manage Workgroup dialog box and click Enable in the Actions column for the account.
See Also
Edit, move, or delete a design