The minimum number of probes depends on the size of the aberration, the number of probes preferred (e.g., 1, 2, 3 or more) to make an aberration call, and the overall noise of the experiment. A good measure for overall noise of an Agilent aCGH experiment is the QC metric DLRSD (derivative log ratio spread, probe-to-probe log ratio noise), and this strongly correlates with DNA quality.
Regarding the maximum number of probes, putting more probes in a given region does not necessarily result in the ability to make smaller aberration calls. (See also Ylstra B et al. Nucleic Acids Research. 2006; 34(2):445–450) for a discussion on functional resolution of CGH experiments. First of all, if a very high-density design is created, it will surely contain probes that have lower scores. All probes in the Agilent HD-CGH database have a predicted performance score (based on Tm (melting temperature), GC content, a hairpin ΔG, sequence complexity, and metrics to measure homology with the rest of the reference genome). The eArray pair-wise reduction algorithm will pick the best HD probes based on the user-selected average HD probe spacing per interval or the total number of HD probes. In the case of a very high-density design, the pair-wise reduction algorithm will no longer be able to return the best HD probes but will return all or most available probes instead. See the FAQ "What is a CGH probe score?” for more information.
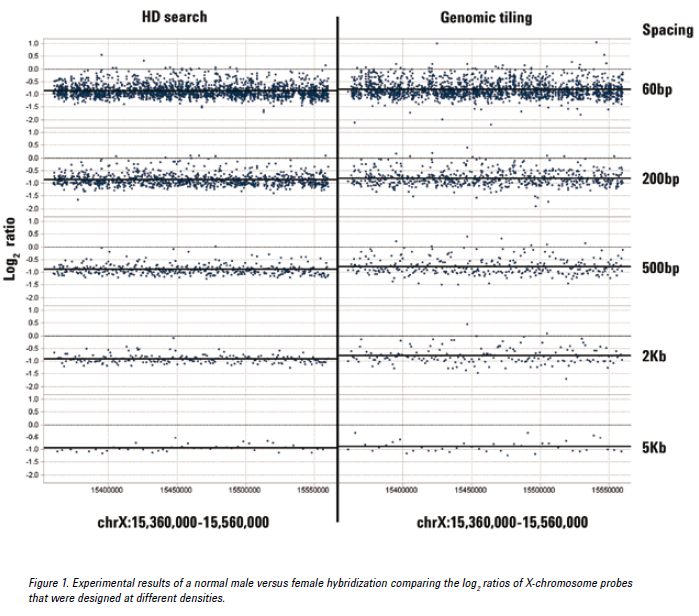
Moreover, very high-density designs might have negative consequences for hybridization. The standard Agilent protocol for DNA labeling yields labeled fragments with a size peak around 200 nt. In the case of a very high-density design, probes on the array will compete for the same fragment for hybridization. Having too many probes in the small region will decrease the signal and might result in noisy data. Agilent does not recommend going lower than 150 to 200 bp spacing.
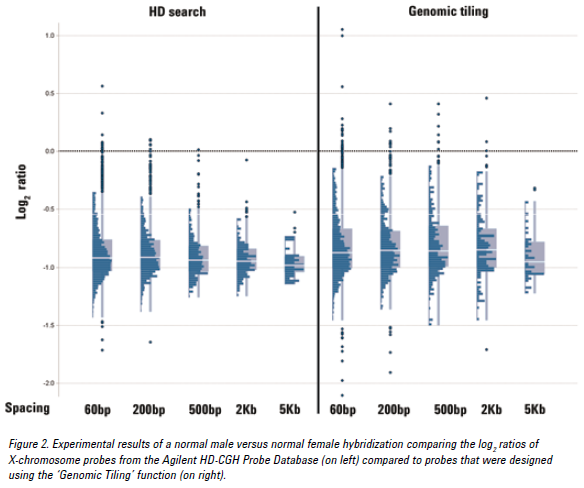
See the figure below for an example of CGH data from probes at various densities using either the HD search or Genomic Tiling. Probes selected from an HD search with up to 200 bp spacing provided log ratios very close to the expected value of -1.